Mary Blake - Works on Paper
Relief Printmaking
Some form of relief printmaking has been done for maybe 6000 years starting in what's now Mexico. And applying an image to paper repeatedly has been done for almost 2000 years, starting in China.
In principal, it's a simple process. You take a flat surface (clay, linoleum, wood, metal) and carve out areas. When you roll ink over that flat surface, it won't get to the areas you carved out. When you press a piece of paper onto the surface, it picks up the ink, creating the image.

Reduction Woodcuts
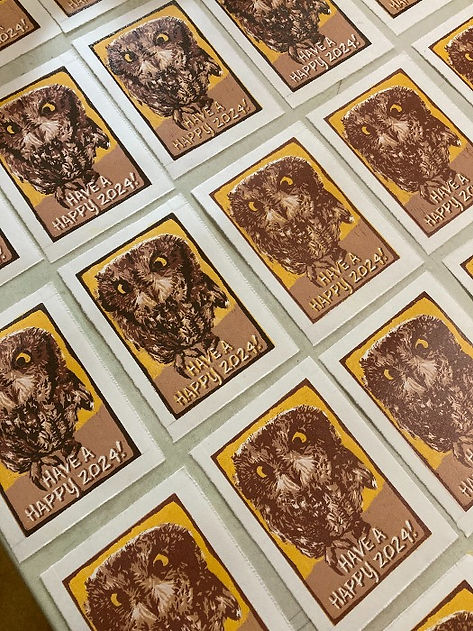
I've been focusing on reduction woodcuts lately. They're relief prints with a twist. You use one plate, carving more and more away with each pass until there's almost nothing left. People's eyes glaze over quickly when I try to describe the process, so here's an example using a pretty simple print.. This is a little holiday card I made using a Western Screech Owl as my subject.
The technique requires planning and I use Photoshop to help with that.
There are amazing printmakers out there who've done beautiful work with 20 or more passes. I think the most I've done is 17. For this holiday card, I only needed 5 passes (very light brown, yellow, medium brown, dark brown and very dark brown).
If you realize on pass 5 that you used the wrong yellow on pass 2, there's nothing you can do, and a friend calls the process "suicide" prints. But I can't quit trying so I call them "seduction" prints.


1 The photo I started with. Pippin is a Western Screech Owl, an ambassador at The Bird Rescue Center in Santa Rosa. (And screech owls are about 6 or 7 inches tall and don't screech.)
2 I transferred the image onto my 4" by 6" wood block. I used a permanent ink marker to give me the information I'd need throughout the process.
3 I painted the block a darker color so it'd be easier to see where I'd carved (trust me, it's really confusing if you don't do this).
4 I coated the wood with a mixture of half shellac and half isopropyl alcohol.
5 And, finally, I carved away where I wanted white to appear in the print.
6 I prepared 25 pieces of paper a little bigger than the block, rolled a very light brown onto the block and printed it 25 times. In the lower part of this photo, you see the result of the light brown pass with just the white showing.
7 Then I carved away, removing any area where I wanted the light brown to show and printed again, this time with a yellow. The upper images show about half-way through the process of printing yellow over light brown.


8 Carving away even more! This time I've carved away the background and the eyes - what I want to be yellow.

9 Half-way through printing a medium brown over the yellow.
10 Darker brown over the medium brown and it's looking more interesting!

11 The final pass - very dark brown to emphasize those eyes and give him more volume..

Did you make it all the way to the end?
I hope you had a wonderful 2024.
And the plate after all but the darkest brown has been carved away.